 EN


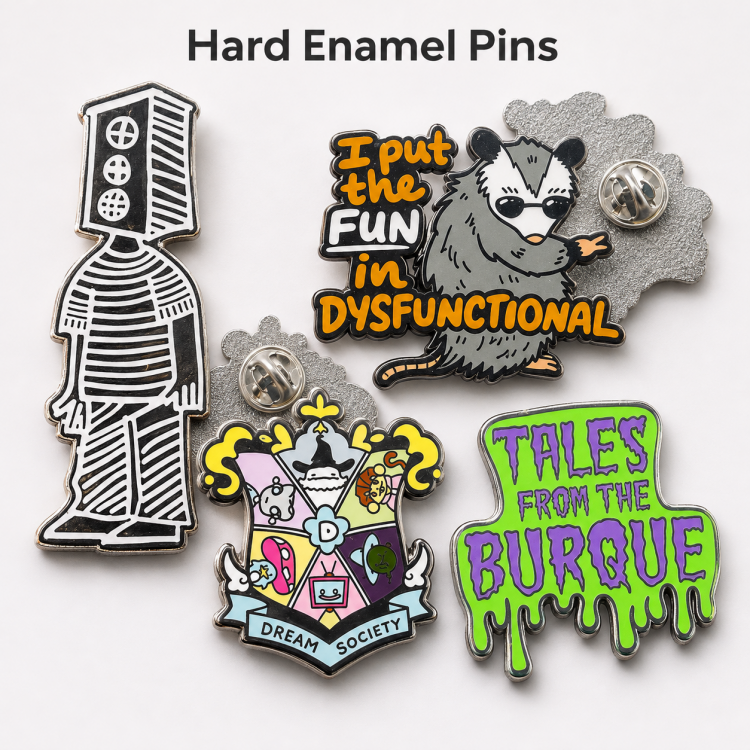
A consistent, polished hard enamel pin is not the result of a single good decision on the factory floor. It begins with choices made long before production: clear artwork, suitable metal construction, controlled color filling, and careful finishing. Understanding which production techniques influence quality helps buyers and designers set realistic specifications, reduce avoidable revisions, and assess samples against the intended result. The enamel pin manufacturing process connects these decisions, so quality depends on how well each stage supports the next.
The most useful improvements are practical rather than mysterious: simplify artwork where metal lines are too fine, specify colors precisely, control plating and enamel application, then inspect the finished piece under consistent conditions. A strong custom enamel pin design gives production teams clean boundaries to follow, while a clear understanding of enamel pin vs soft enamel helps align the desired surface with the right process. These steps make quality more repeatable, not merely more attractive in a product image.
Design Specifications That Prevent Quality Problems
Build Artwork Around Enamel and Metal Boundaries
A hard enamel pin should account for the raised metal lines that separate color areas. Lines that are too narrow can become fragile or difficult to reproduce, while very small enclosed spaces can be hard to fill evenly. Review the artwork at the intended finished size, not only on a large screen, and simplify tiny details that lose definition when reduced. During the enamel pin manufacturing process, clear separations help operators apply color accurately and reduce the chance of adjacent fills running together.
The distinction in enamel pin vs soft enamel also matters at the design stage. Hard enamel is filled and polished toward a smooth surface level with the metal borders, so the artwork needs durable outlines and color areas that can withstand grinding and polishing. A custom enamel pin design that relies on delicate gaps or extremely fine lines may need adjustment before tooling. A designer and production team can confirm minimum practical details against the proposed dimensions rather than assuming every screen detail will transfer exactly.
Set Dimensions, Color, and Plating Expectations
Specify finished width and height, outline thickness, backing type, and plating finish before approving production artwork. A custom enamel pin design should include color references, especially when a brand palette must be reproduced across multiple pieces or later orders. Color references guide the match, although enamel appearance can still vary with material, lighting, and the viewing environment. Discuss the acceptable visual range and confirm how the sample will be judged. This makes the enamel pin manufacturing process less dependent on subjective interpretations of words such as bright or dark.
Plating contributes to appearance and should be considered alongside the enamel palette. A warm metallic finish can change how neighboring colors appear, while a high-contrast border can make small imperfections more visible. When evaluating enamel pin vs soft enamel, consider whether the raised metal lines or flush polished surface better suit the artwork. Documenting those choices within the custom enamel pin design gives the production team a stable reference and reduces last-minute changes that could affect consistency.
Hard Enamel vs Soft Enamel: A Practical Comparison
The two finishes are not a ranking but a design decision. The table below summarizes the practical differences buyers should weigh before tooling.
| Comparison Point | Hard Enamel | Soft Enamel |
|---|---|---|
| Surface | Filled and polished flush with metal borders; smooth, level face | Recessed color areas below raised metal lines; dimensional feel |
| Production steps | Repeated filling, curing, grinding, polishing | Filling and curing; no flush polishing stage |
| Line width tolerance | Needs durable outlines able to withstand grinding and polishing | Fine lines more tolerable because they stay raised |
| Small enclosed areas | Harder to fill evenly; uneven depth shows after polishing | Less critical; recessed fill hides minor depth variation |
| Appearance | Refined, jewelry-like, strong color-metal contrast | Tactile, graphic, pronounced metal outlines |
| Best fit | Premium presentation, smooth-face branding, faithful color separation | Visible recessed color, dimensional metal lines, tighter budgets |
| Main quality risk | Polishing scratches, dips, uneven fill depth | Uneven fill levels, color pooling in small cavities |
Neither surface is automatically the right choice for every design. For a hard enamel pin, polishing quality depends on the artwork, fill consistency, and careful material removal working together. A custom enamel pin design with distinct, adequately sized color fields gives the finishing stage a more reliable foundation.
Controlled Production Methods for a Smooth Finish
Manage Metal Forming and Enamel Filling
The enamel pin manufacturing process begins with a metal base shaped to the approved outline and relief. Clean, well-defined cavities help create consistent borders and provide clear spaces for color. The metal surface and recessed areas need to be prepared so enamel can be applied cleanly. For a hard enamel pin, colors are added into recessed sections and brought through repeated filling and curing stages as required by the production specification. Even placement matters because uneven fill levels can remain visible after polishing.
A useful production check is to compare color coverage across several sample areas, including narrow sections and corners. These details often reveal whether the enamel pin manufacturing process is controlling fill depth consistently. The planned custom enamel pin design should avoid excessive tiny compartments when a smooth, uniform surface is the priority. In enamel pin vs soft enamel, the hard enamel route involves filling and polishing the color areas flush with the raised metal, which makes even preparation particularly important.
Polish Carefully and Protect Surface Definition
After filling and curing, grinding and polishing create the characteristic level surface of hard enamel. This stage should remove excess material without flattening important metal details or creating visible scratches. Controlled polishing supports a clean transition between enamel and border, while rushed or uneven finishing can leave dips, rough edges, or inconsistent shine. The enamel pin manufacturing process should preserve the approved outline and plating appearance through finishing, not treat polishing as a cosmetic correction for earlier process issues.
The finish is one of the clearest practical differences in enamel pin vs soft enamel. Hard enamel is generally polished closer to a level surface, whereas soft enamel retains recessed color areas and raised metal lines. As the comparison table shows, the choice should follow the artwork and the intended feel, not habit.
Inspection and Decisions That Sustain Quality
Use Sample Approval and Focused Inspection
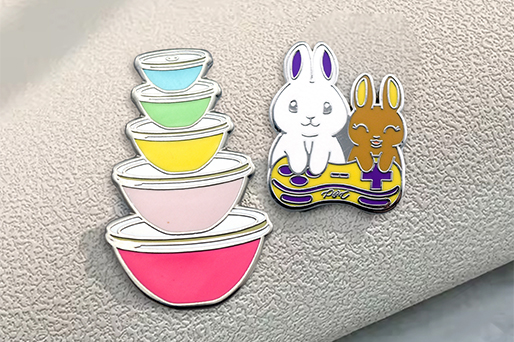
Inspect a production sample for outline accuracy, color placement, surface level, plating consistency, and attachment alignment. Check it in ordinary room light as well as direct light, since glare can hide or exaggerate surface marks. Confirm that the sample reflects the final dimensions and finish before authorizing a full run. In the enamel pin manufacturing process, written approval notes are useful because they record which visual details matter and make later checks more objective.
Inspection should reflect the intended use. A pin viewed up close for a premium presentation may need closer scrutiny of polishing and color boundaries than one designed primarily for everyday wear. Compare the finished piece with the approved hard enamel pin , not just with a digital rendering. When considering enamel pin vs soft enamel, judge the actual surface against the desired feel and appearance instead of assuming one finish is inherently more accurate or durable.
Match the Production Method to the Quality Goal
The best quality plan starts by identifying what must remain consistent: small lettering, a specific metallic tone, a smooth face, or faithful color separation. If a flush, polished appearance is central, hard enamel may fit the brief; if visible recessed color and dimensional metal lines are desired, enamel pin vs soft enamel becomes a design decision rather than a simple ranking. Discuss complexity, dimensions, and acceptable variation before production. A well-documented custom enamel pin design helps translate that decision into repeatable instructions.
No single technique compensates for weak specifications. Clear artwork, suitable line widths, controlled filling, careful polishing, and documented sample approval work as a system. Ask how the enamel pin manufacturing process will handle the design's smallest features and how finished pieces will be checked. This practical conversation identifies constraints early and helps set a quality standard that can be evaluated consistently without relying on vague claims or unrealistic expectations.
FAQ
Which production stage has the greatest effect on a smooth surface?
Filling and polishing both matter. Consistent enamel depth gives the polishing stage a uniform surface to finish, while controlled grinding helps bring color and metal borders into the intended relationship. A hard enamel pin can show unevenness if either step is poorly matched to the design.
How can artwork be prepared for reliable production?
Review the custom enamel pin design at actual size, use clear color references, and check that metal borders and enclosed color areas are practical to manufacture. Confirm the smallest details with the production team before approving the enamel pin manufacturing process.
How should buyers choose between hard and soft enamel?
Choose based on the desired surface and the artwork. Enamel pin vs soft enamel is chiefly a question of finish and design fit: hard enamel offers a polished, more level face, while soft enamel keeps recessed color areas. Approve a representative sample before production.